
Install Apache Airflow on Windows with WSL
In this article, you will learn how to install Apache Airflow on Windows with WSL. Apache Airflow is an open-source platform for developing, scheduling, and monitoring batch-oriented workflows.
Prerequisites
- Python
- Pip - Python package manager
Step-1:Install Windows Subsystem for Linux
Windows Subsystem for Linux (WSL) allows you to run a Linux environment without the overhead of a traditional virtual machine or dualboot setup. In PowerShell or Windows Command Prompt as administrator enter the "wsl --install" command to install Windows Subsystem for Linux. This command will install the Ubuntu Linux distribution.
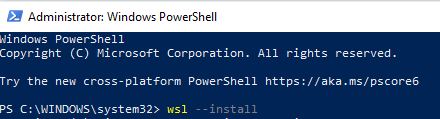
The above command only works if WSL is not installed at all. If you run "wsl --install" and see the WSL help text as shown below.

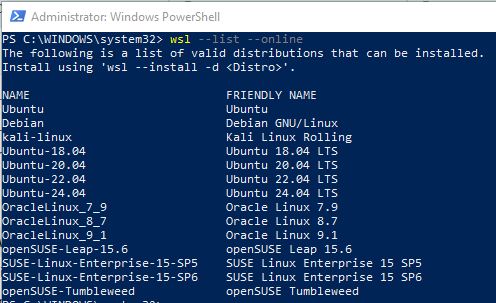
Try running wsl --list --online to see the list of available Linux distribution and run "wsl --install -d
PowerShell commands
Step-2: Verify Ubuntu Installation
After completeing step-1, launch Ubuntu app and type command "lsb_release -a" to check the Ubuntu version installed and you will see the similar information shown below.
Ubuntu command
lsb_release -a

Step-3: Install and activate virtualenv
Python community established practice is to perform application installation in a virtualenv created with virtualenv or venv tools. To create isolated Python environment install "virtualenv" using pip3. Now create and activate a virtual environment to isolate the Apache Airflow installation using the below commands.
sudo pip3 install virtualenv
virtualenv airflow_virtualenv
cd airflow_virtualenv/bin
source activate
Step-4: Install Apache Airflow
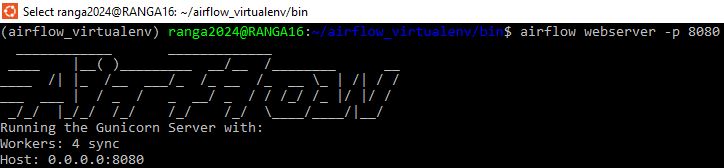
After creating virtual environment install Airflow and for learning initialize the default database SQLite option using the following commands. Then create admin user and start the airflow webserver to access Airflow UI (Airflow UI makes it easy to monitor and troubleshoot your data pipelines). Open another Ubuntu terminal and start the Airflow scheduler (Airflow scheduler monitors all tasks and Directed Acyclic Graphs(DAGs), then triggers the task instances once their dependencies are complete).
export AIRFLOW_HOME=~/airflow
pip install apache-airflow
airflow db init
airflow users create \
    --username Testadmin \
    --firstname TestFirstName \
    --lastname TestLastName \
    --role Admin \
    --email test@learncodingez.org \
    ----password Test
airflow webserver -p 8080
airflow scheduler
Step-4: Access the Airflow UI
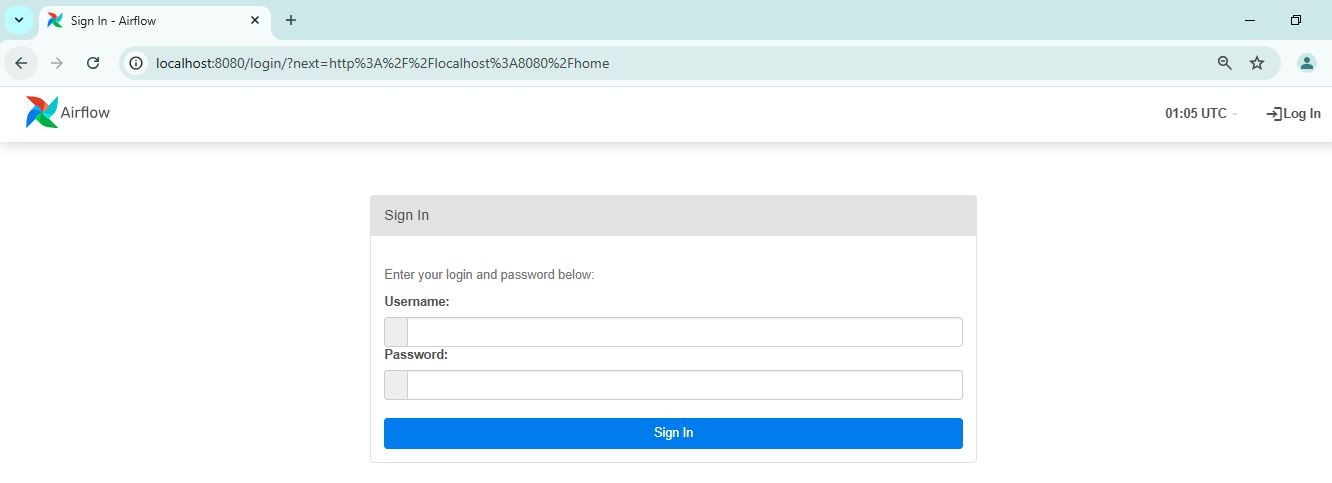
Access the airflow using localhost:8080 in your browser and log in with the admin account created in the previous step. Below are some of the features and visualizations you can find in the Airflow UI.
Airflow Sign-In page
Airflow DAGs View

Airflow Cluster View

Congratulations, you’ve successfully completed the article and installed Apache Airflow on Windows with WSL,